Ever tried climbing an icy cliff face only to realize your gear wasn’t up for it? Yeah, that sinking feeling right there—we’ve been there.
If you’re a winter mountaineer or ice climber, mastering the use of an ice piton for winter mountaineering could mean the difference between reaching the summit and turning back empty-handed. Or worse—getting stuck. This guide breaks down what they are, how to use them, and why they matter so much in extreme conditions. Let’s get into it!
Table of Contents
- Why Ice Pitons Matter in Winter Mountaineering
- Step-by-Step Guide on Using an Ice Piton
- Best Practices for Selecting and Maintaining Your Gear
- Real-Life Examples: Tales from the Summit
- Frequently Asked Questions About Ice Pitons
Key Takeaways
- An ice piton is essential for securing safety anchors during winter climbs.
- Proper technique and maintenance can extend the life of your gear—and keep you alive.
- Not all ice pitons are created equal; material and design play critical roles.
Why Ice Pitons Matter in Winter Mountaineering
Imagine this: You’re halfway up a frozen waterfall when one of your screws refuses to hold properly. Panic sets in. Now, imagine if instead, you had dependable ice pitons as backup. Sounds like a no-brainer, but too many climbers underestimate their value.
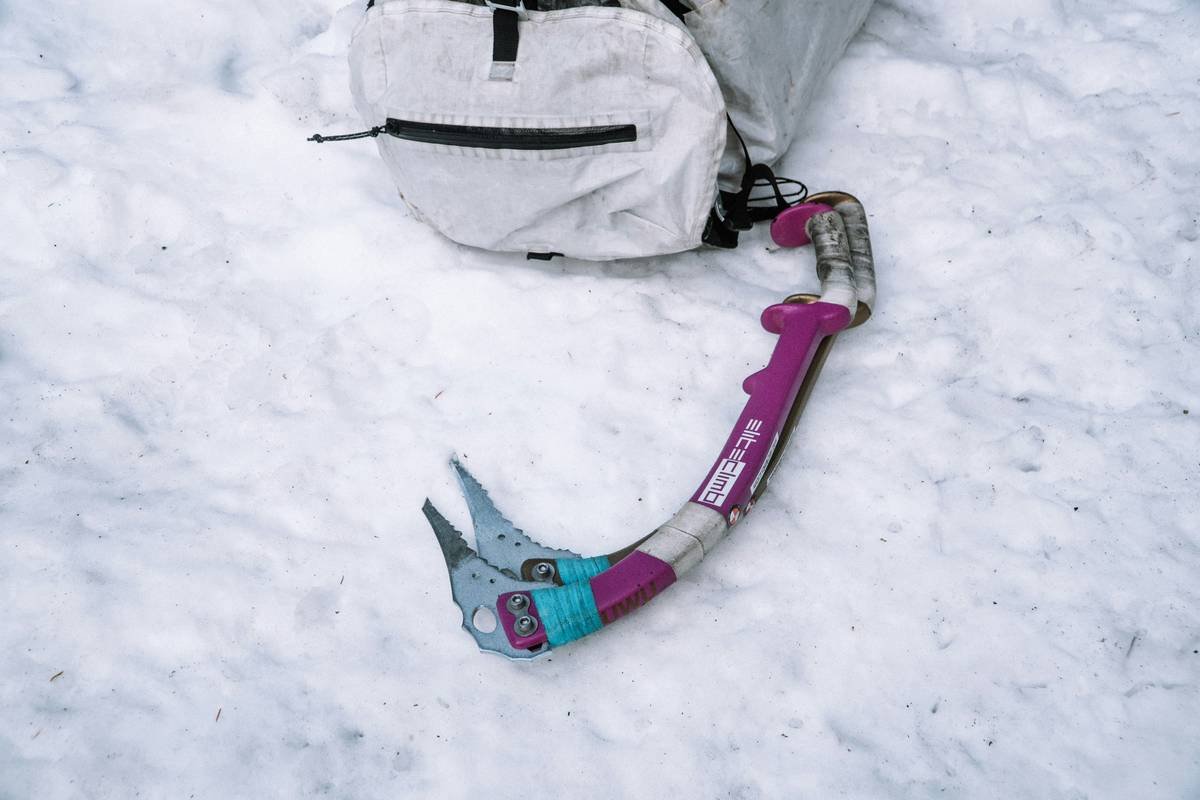
Ice pitons differ from regular pitons because they’re designed specifically for cold environments where rock meets ice. These metal spikes literally save lives by providing stable anchor points in slippery terrain. Without them, even the most experienced mountaineers risk slipping off cliffs faster than you can say “avalanche.”
*Confession:* Once, I was so excited about testing new gear that I skipped checking my pitons’ condition before heading out. Spoiler alert: One snapped mid-climb. Thankfully, my partner caught me before I tumbled down what felt like eternity.
The Brutal Reality of Cheap Pitons
Sure, skimping on cost might seem tempting, especially after investing in pricey boots and crampons. But cheap pitons? A terrible idea. They break under pressure, leaving you vulnerable in situations where failure equals disaster. Trust me, no amount of savings justifies risking your neck for subpar gear.
Step-by-Step Guide on Using an Ice Piton
Optimist You says: “Let’s place this sucker perfectly!” Meanwhile, Grumpy You retorts: “Ugh, fine—but only if coffee’s involved.”
Step 1: Scout the Terrain
Look for cracks or crevices in the ice-covered rocks where the piton will fit securely. Avoid areas with loose debris—it won’t hold well.
Step 2: Hammer Time (Literally)
Gently tap the piton until it starts seating itself. Then, give it solid whacks to ensure it’s lodged deeply. Think less Home Depot DIY project, more “Thor wielding Mjölnir.” Just don’t overdo it—you don’t want to damage the surrounding surface.
Step 3: Test Before Trusting
Pull and push against the installed piton to confirm stability. If it wobbles, remove it and try another spot. Repeating this process ensures a secure base for your next move.
Pro Tip:
Always carry extras. There’s nothing worse than running out mid-route.
Best Practices for Selecting and Maintaining Your Gear
- Material Matters: Stainless steel resists corrosion better than carbon steel, which means longer-lasting durability.
- Inspect Regularly: Look for cracks, rust, or deformities. Damaged pitons = potential death traps.
- Lubricate Slightly: Use a light coat of oil to prevent freezing caused by moisture buildup inside cracks.
- Practice Placement: Get comfortable using pitons on safe indoor walls before taking them outdoors.
Real-Life Examples: Tales from the Summit
Roger Payne, renowned alpinist, once recounted his harrowing ascent of Mont Blanc using old-school pitons salvaged from forgotten expeditions. He admitted, “It wasn’t ideal, but it worked.”
Nowadays, advanced designs make modern ice pitons far superior. Yet Roger’s story proves one thing: Skill trumps equipment any day. Still, nobody’s saying don’t upgrade—please do!
Frequently Asked Questions About Ice Pitons
Are Ice Pitons Legal?
Depends on local regulations. Some protected areas prohibit their use due to environmental impact. Always check guidelines first.
Can Beginners Use Them Effectively?
Absolutely! With proper training, beginners can master basic techniques. However, seasoned mentors often recommend starting with simpler tools like screws.
How Much Should I Spend?
Expect to pay $20-$50 per piece. Remember: Quality outweighs quantity here. Invest wisely.
Conclusion
Your survival hinges not just on skill but also on reliable gear like the ice piton for winter mountaineering. Understanding its purpose, learning proper usage, and maintaining top-notch quality prepares you for whatever Mother Nature throws your way.
So whether you’re tackling vertical icicles or scaling frostbitten peaks, arm yourself with knowledge—and the right pitons. Because at 10,000 feet above sea level, mistakes aren’t tolerated lightly.
And remember:
Summit calls,
Piton holds tight,
Winter whispers.

